467.C00
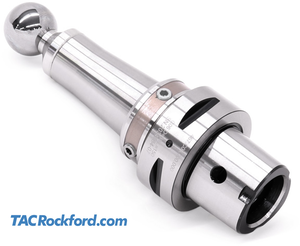
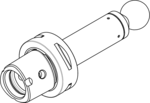
PSC Precision Ball-End Runout Test Arbors
Ball-end arbors are typically used on 5-axis machining centers. Our 467 precision version feature an adjustment mechanism which allows for improved accuracy
| Taper | Length (L) | Ball Dia. (D) | Runout | Standard | Part Number | |||
|---|---|---|---|---|---|---|---|---|
| PSC 32 / C3 | 150 mm | 30 mm | <0.005 mm | ISO 26623-1 | 467.C03.000.000 | |||
| PSC 40 / C4 | 150 mm | 30 mm | <0.005 mm | ISO 26623-1 | 467.C04.000.000 | |||
| PSC 40 / C4 | 100 mm | 0.5 inch | <0.005 mm | For Tsugami Machines | 467.C04.71147 | |||
| PSC 50 / C5 | 150 mm | 30 mm | <0.005 mm | ISO 26623-1 | 467.C05.000.000 | |||
| PSC 63 / C6 | 150 mm | 30 mm | <0.005 mm | ISO 26623-1 | 467.C06.000.000 | |||
| PSC 63 / C6 | 50 mm | 20 mm | <0.005 mm | For DN Solutions Machines | 467.C06.81072 | |||
| PSC 63 / C6 | 2 in | 0.75 in | <0.005 mm | For DN Solutions Machines | 467.C06.80977 | |||
| PSC 80 / C8 | 150 mm | 30 mm | <0.005 mm | ISO 26623-1 | 467.C08.000.000 | |||
| PSC 80 / C8 | 50 mm | 20 mm | <0.005 mm | For DN Solutions Machines | 467.C08.81072 | |||
| PSC 80 / C8 | 2 in | 0.75 in | <0.005 mm | For DN Solutions Machines | 467.C08.80977 | |||
| Custom Configuration | Contact Us | 467.C00.SP |
Carrying Cases for PSC Precision Ball End Runout Arbors
TAC Rockford runout arbor cases are specifically designed to protect your precision spindle runout test arbors. These cases feature high-density, custom-cut foam interiors that secure the arbors. They ensure your critical measurement tools are shielded from dirt, damage, and impact, maintaining their accuracy and readiness for preventative maintenance.
| Runout Arbor Type / Size | For use with runout arbor(s) | Case Style | Part Number | |||||
|---|---|---|---|---|---|---|---|---|
| PSC 32 / C3 | 467.C03.000.000 | Compact | 499.212.113328 | |||||
| PSC 40 / C4 | 467.C04.000.000 | Compact | 499.212.113163 | |||||
| PSC 40 / C4 | 467.C04.71147 | Compact | 499.212.113453 | |||||
| PSC 50 / C5 | 467.C05.000.000 | Compact | 499.212.113055 | |||||
| PSC 63 / C6 | 467.C06.000.000 | Compact | 499.212.113191 | |||||
| PSC 80 / C8 | 467.C08.000.000 | Compact | 499.212.113329 |
Indicators and Bases
TAC Rockford offers a variety of magnetic bases and indicators for use with runout test arbors and other gauges.
Available as kits with storage case or individually.
• Arbors are factory-adjusted to <=0.005 mm (0.0002")
• Carrying cases are not included. Visit www.tac.us/runoutcases for available case styles (Data Sheet 465.006).
• A certificate of accuracy is included. Traceable certificates available; contact us for details.
• Contact us for other ball diameters and gauge lengths. Inch dimensions are also available.
For more information regarding this item (PSC Precision Ball-End Runout Test Arbors) or other items, fill out the form below
or contact our office directly:
Telephone: 815-962-5600
Fax: 815-962-4600
Location: 304 North Main St, Suite 104, Rockford, IL 61101-1101 USA
Email: infο@ΤΑCRοckfοrd.cοm
Related
PSC / PSK Taper Standard Ball-End Runout Test Arbors
Precision Spindle Analysis for 5-Axis Machining
Ensure the highest levels of accuracy and performance from your machine tools with the TAC Rockford PSC (Polygonal-Shank Taper) Ball End Test Arbor. Specifically designed for the verification of 5-axis machining centers, this precision instrument is essential for maintaining spindle health and positioning integrity.
Key Features:
PSC Taper Standard: Built to the ISO 26623 Standard for seamless integration and accurate seating in your PSC spindle.
5-Axis Positioning Accuracy: Primarily used for precisely checking the positioning accuracy of 5-axis spindles, especially the Rotary Tool Center Point (RTCP).
Spindle Runout Verification: Functions as a highly accurate runout test arbor to quickly and easily check that your machine spindle is running true.
Versatile Ball End: The precision ball end is ideal for establishing a consistent and repeatable touch-off point from the spindle face, a critical step for machine setup and calibration. It also provides a shorter alternative to standard runout bars when required.
Precision and Reliability: TAC Rockford's commitment to quality ensures a reliable instrument for periodic performance checks, verification after a machine crash, or installation/relocation.
Included Certificate of Accuracy: Each arbor comes with a certificate of accuracy to confirm its adherence to strict quality standards.


