467.163.000.000
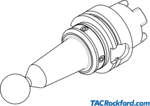
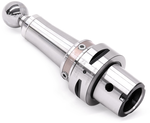
HSK Precision Ball-End Runout Test Arbors - HSK-A/C/E 63 + B/D/F 80
For verification of 5-axis HSK taper spindle machining centers
| Product | Gauge |
| Part Type | Runout Arbor |
| Diameter (D) | 30 mm |
| Length (L) | 150 mm |
| Standard | DIN 69893 / ISO 12164 / ASME B5.62 |
| Taper | Length (L) | Diameter (D) | Standard | Part Number | ||||
|---|---|---|---|---|---|---|---|---|
| Custom Size/Length/Diameter | Contact us with your requirements | 467.100.SP | ||||||
| HSK-A/C/E 32 + B/D/F 40 | 150 mm | 30 mm | DIN 69893 / ISO 12164 / ASME B5.62 | 467.132.000.000 | ||||
| HSK-A/C/E 40 + B/D/F 50 | 150 mm | 30 mm | DIN 69893 / ISO 12164 / ASME B5.62 | 467.140.000.000 | ||||
| HSK-A/C/E 50 + B/D | 150 mm | 30 mm | DIN 69893 / ISO 12164 / ASME B5.62 | 467.150.000.000 | ||||
| HSK-A/C/E 63 + B/D/F 80 | 150 mm | 30 mm | DIN 69893 / ISO 12164 / ASME B5.62 | 467.163.000.000 | ||||
| HSK-A/C 80 | 150 mm | 30 mm | DIN 69893 / ISO 12164 / ASME B5.62 | 467.180.000.000 | ||||
| HSK-A/C 100 | 150 mm | 30 mm | DIN 69893 / ISO 12164 / ASME B5.62 | 467.190.000.000 | ||||
| HSK-A 125 | 150 mm | 30 mm | DIN 69893 / ISO 12164 / ASME B5.62 | 467.192.000.000 | ||||
| HSK-F 63 | 150 mm | 30 mm | DIN 69893 / ISO 12164 / ASME B5.62 | 467.663.000.000 | ||||
| HSK-F 80 | 150 mm | 30 mm | Makino HSK Flange-Pin Spindles | 467.680.000.000 |
Overview: Spindle Runout Arbor Carrying Cases
Whether your gauges need to be transported on a frequent basis, or need to be stored in one area for a period of time, we can offer a reliable solution.
Spindle Runout Test Arbor Instructions
One of the leading causes of tool breakage, part finish issues, tolerance control, and machine registration issues is excessive spindle runout.
For more information regarding this item (HSK Precision Ball-End Runout Test Arbors - HSK-A/C/E 63 + B/D/F 80) or other items, fill out the form below
or contact our office directly:
Telephone: 815-962-5600
Fax: 815-962-4600
Location: 304 North Main St, Suite 104, Rockford, IL 61101-1101 USA
Email: infο@ΤΑCRοckfοrd.cοm
Related
HSK Precision Ball-End Runout Test Arbors
Our 467 precision version feature an adjustment mechanism which allows for improved accuracy when compared to our standard 466 ball arbors.
KM Precision Ball-End Runout Test Arbors
Ball end spindle runout test arbors are designed checking positioning accuracy of 5-axis machines, but can also be used in place of a standard runout test bars when a shorter length is required or for a touchoff point from the spindle face (ball end is ideal for this purpose).
Our 467 precision version feature an adjustment mechanism which allows for improved accuracy.
* ISO 26622 runout arbor tapers are compatible with machines using TS, XMZ (Mazak Integrex), and ATC. Flange may not be suitable for use with automatic tool changers.
Steep Taper Precision Ball-End Runout Test Arbors
Our 467 precision version feature an adjustment mechanism which allows for improved accuracy when compared to our standard 466 ball arbors.
HSK Standard Ball-End Runout Test Arbors
Ball end spindle runout test arbors are designed checking positioning accuracy of 5-axis machines, but can also be used in place of a standard runout test bars when a shorter length is required or for a touchoff point from the spindle face (ball end is ideal for this purpose).
PSK Precision Ball-End Runout Test Arbors
Ball-end arbors are typically used on 5-axis machining centers.
Our 467 precision version feature an adjustment mechanism which allows for improved accuracy
Steep Taper Standard Ball-End Runout Test Arbors
Ball end spindle runout test arbors are designed checking positioning accuracy of 5-axis machines, but can also be used in place of a standard runout test bars when a shorter length is required or for a touchoff point from the spindle face (ball end is ideal for this purpose).
HSK Spindle Runout Test Arbors
- Maximum runout error 0.003mm / 3 micron / 0.00012 inch.
- Carrying cases are not included. Visit Data Sheet 465.006 for available case styles.
- A certificate of accuracy is included. Traceable certificates available; contact us for details.
- Contact us for other lengths, tapers, and other special requirements.
PSC / PSK Spindle Runout Test Arbors
Made to the ISO 26623 Standard. Maximum runout error 0.003mm / 3 micron / 0.00012”. A certificate of accuracy is included. Storage are cases not included.
Steep Taper Spindle Runout Test Arbors
-Maximum runout error 0.003mm / 3 micron / 0.00012 inch
-Cylindricity ≤ 0.002mm / 2 micron / 0.00008 inch
-Carrying cases are not included. Visit www.tac.us/runoutcases for available case styles (Data Sheet 465.006).
-A certificate of accuracy is included. Traceable certificates available; contact us for details.
-Contact us for other lengths, tapers, and other special requirements.
Spindle Runout Test Arbors
-Maximum runout error 0.003mm / 3 micron / 0.00012 inch
-Cylindricity ≤ 0.002mm / 2 micron / 0.00008 inch
-Carrying cases are not included. Visit www.tac.us/runoutcases for available case styles (Data Sheet 465.006).
-A certificate of accuracy is included. Traceable certificates available; contact us for details.
-Contact us for other lengths, tapers, and other special requirements.


